This video is not an official part of the Projections on Stage sequence, but it is an excellent additional resource. It is intended to help people who are working their way into the use of scenic projections and might have only modest experience with general theatre technology. It is included with media leased by theatres for various productions. For more information on that, you can go here.
Transcript:
Hi. I’m Matt Kizer.
In this brief tutorial, I’m going to provide tips on how to make the most out of projections on stage.
Projections can add a lot of magic to any stage production. They seriously advance the story-telling with visuals. Compared to scenery that is built out of wood and paint, they can save a lot of time, and a lot of money.
They are not completely magical, though. They need a little bit of care and they need the right environment.
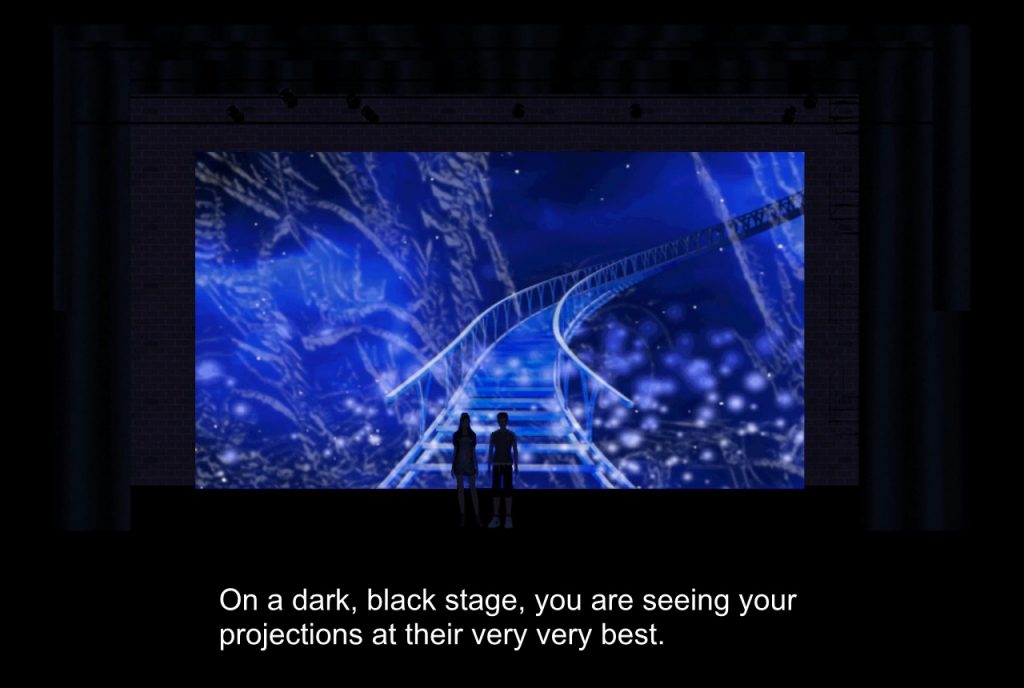
The biggest threat to your projections is the stage lights. When you first turn on your projector and connect it to a computer, and your stage is dark, your projections will look amazing. On a dark, black stage, you are seeing your projections at their very very best. We want to stay as close to that level of magic as we can.
When any kind of direct or ambient light hits the image, it loses contrast. The blacks get filled in with light, and they’re not so black any more.
The whites lose their contrast. Subtle colors like browns and darker reds disappear.
Projectors and lighting instruments both shoot out light. Their brightness is measured in units called lumens. The thinner you spread this light, the dimmer it gets. Any single projector is usually dimmer than most heatrical lighting fixtures.
Your stage lights can totally overwhelm your projected image and wash it out. No matter how bright your projector is, the stage lights will always be able to ruin it if you don’t use them with care.
There are lots of things you can do to avoid washing out your projections.
Depending on your space and on your equipment, you might not be able to do all of them. Just do what every theatre everywhere does: Do the best you can, with the time and the people and the resources that you have
available.
First, let’s look at the really obvious thing: How bright is your projector?
Once upon a time, theatres used projectors that only put out maybe 300 lumens. I remember doing shows back when having 1000 lumens was a huge deal. We used a lot of tricks back then to make projections look good.
In the year 2020, a normal classroom projector might range between 3000 and 4000 lumens. These can work just great on stage. I’ve used them many times. If you can get up into the 6000, 7000, or even 10,000 lumen range or higher, you’ll definitely have an easier time. The brighter ones are more expensive to rent or to own. Just get the best and the brightest unit that you can within reason.
If you use a lot of the tips that I am going to describe here, you should be in great shape. Let’s get the most out of your equipment.
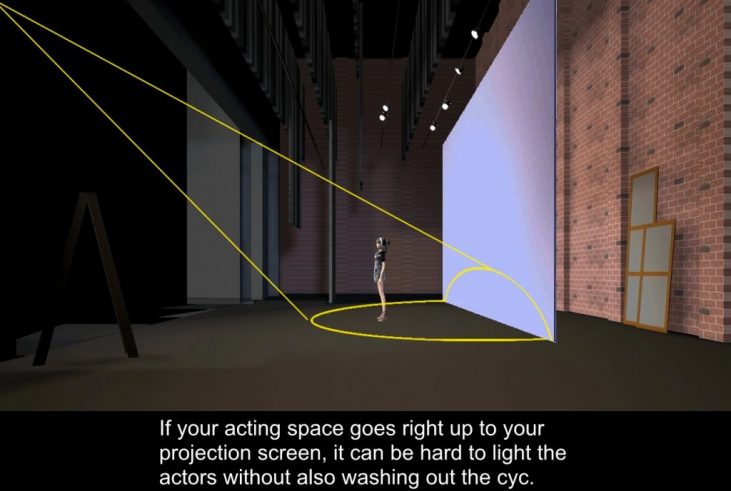
The first thing that I recommend if it is at all possible is that you get some distance between your image and your performers.
If your acting space goes right up to your projection screen, it can be hard to light the actors without also washing out the cyc. Try to have the set end in some way before it gets all the way back to the projection surface.
This could be as simple as having the floor paint end in a no-actor zone a good six or eight feet from the cyclorama.
Sometimes I’ll put a little wall on the floor at the bottom of the cyclorama.
This lets me raise the image up a little higher above the floor. The wall could be simple black, or it could be part of the painted scenery. You could also include some space behind that wall before you get to the screen to protect the image even more.
If it suits your show better, you could put a platform that goes all the way across the stage with space behind it.
The second thing I recommend is that you minimize how brightly your floor will glow. No matter what you do, light is going to bounce off the floor. Some of that light will scatter upstage towards your image. If the floor is white, it will act like a light source. Darker colors, grays, and browns are usually better choices.
And now, the most important thing: How are you lighting the stage?
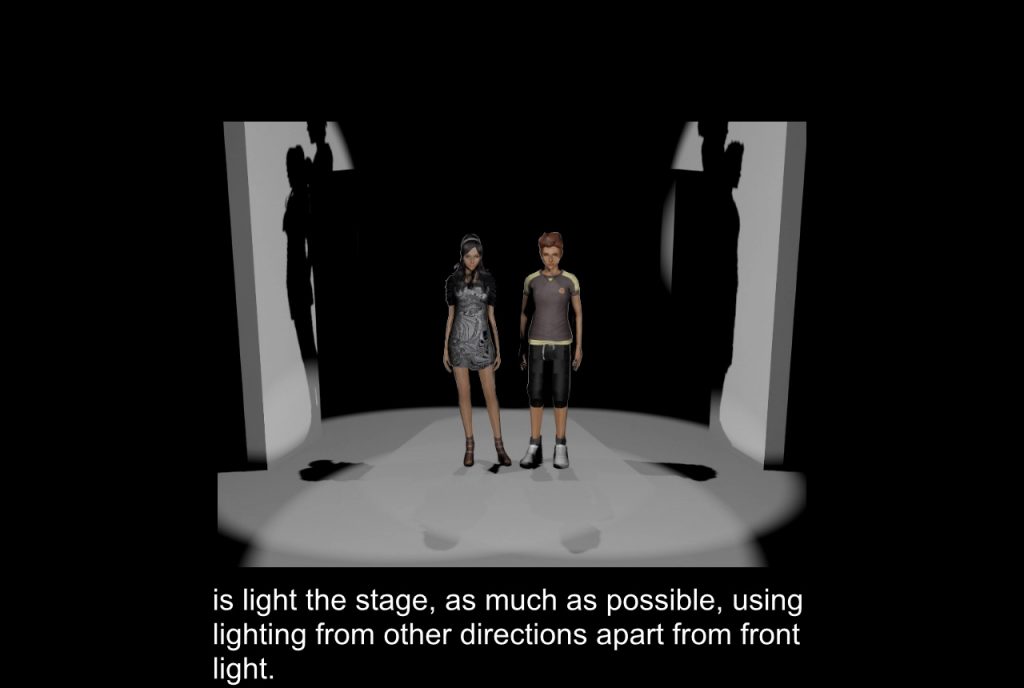
Too much front light can wash out projections, even with some distance between the actors and the image. What you need to do, as much as you can, is light the stage, as much as possible, using lighting from other directions apart from front light.
First and foremost, sidelight is your friend. A great thing to do is to create low sidelight positions along both sides of the stage. An easy way to do this is to mount ellipsoidals to plywood squares called “floor mounts.”
Here is a very simple drawing of these.
This image shows overlapping sidelight fields of light. Notice that the units are set back a little into the wings so that they are fairly wide by the time the light emerges from the wings.
Ellipsoidals include Source Fours, Lekos, Altman 6x9s, 6x12s, and lots of other instruments. The important thing is that you use instruments
that let you use shutter-cuts. Shutters are built into these instruments.
They let you push levers into the sides of the instrument so that you can manipulate the shape the field. You want to use these to shoot the light right along the floor. Use the shutters to crop the light off of the
projection screen or cyclorama, and then off of the floor itself. If you do this from both wings, you end up with a lot of light passing all through the acting space, but none of it is hitting your projected image,
and none of it is bouncing off the floor.
The second type of light you want is top-light. The second type of light you want is top-light. Some people call it down-light. It’s just what it
sounds like, it’s light from above. If you can, tip your lights so that they point a little bit downstage, towards the audience, then when they bounce off of the floor, they will bounce away from the projections.
The third type of light you want is isolation lighting. This is usually either follow spots or what we call specials. A special is single light that is focused on one specific area. Ideally, one way or the other, you will be
isolating the important players on stage within any given scene. If you don’t like the look of a hard-edged follow spot, consider putting some diffusion into it to make it soft and fuzzy. This can also make it a lot easier for beginning operators to make it look smooth.
Front light is the fourth type of lighting you should lean on. When you build each lighting cue, start with the other three kinds. Make the cue look as good as you can using a combination of those three. Then, if the look still needs a little boost on faces, add in the front light until there is just
enough.
When you are writing cues, also: question your instincts a little. A bright sunny day does not necessarily need to have lots and lots of light on stage.
If the projection is telling the story about the sunny day, consider whether or not adding a lot of light to the composition is going to make it look more
like a sunny day or not. Sometimes adding light spoils the story by
disrupting the projection.
If you have as many of these tips in place for your show as possible, you will find that you don’t need a whole lot of front light, and for many scenes, you might need any. You should find that your performers are beautifully lit and visible, and the projections can hold their own against the stage light.
[This is] a complete transcript of this video. I hope this is all helpful to you and to your company. I hope you enjoy theatre technology
as much as I do. Have a great process, and break a leg!
Music: Perspectives by Kevin MacLeod (incompetech.com)
Licensed under Creative Commons: By Attribution 3.0 License
http://creativecommons.org/licenses/by/3.0/


 Random Item